Group 3 - Music Video

Group 3 - Digipak

Group 3 - Digipak
Our Digipack, top left - back, top right - front, bottom left - inside panel, bottom right - inside panel (CD)
This is a link to our website, click the image above to enter our site

Friday, 13 March 2015

R+P Post 19: Our rough cut


Decisions
We used Adobe Premiere Pro CS5.5 to create our rough cut. The process involved viewing our rushes, selecting the best takes and cropping and then positioning them onto the video and audio tracks. We added music and SFX such as the alarm clock sound. We also added titles to see ho the rough cut would look with all the basic elements put together.

Reflections
We created match on actions and showed off a few continuity techniques such as ellipsis as Mario travels from his house to the takeaway and shot reverse shot when he talks to his date. We made the narrative flow and our camera movements such as panning were done well. However we did break some continuity rules. At 0.21-0.29 into the rough cut, you can see the shot jump cuts from the door to a closer up shot of it and back to a farther shot of it. We should have filmed the whole shower scene in one go. For our main shoot we will definitely be changing and adding some shots.

Here is the list of improvements we came up with after watching our rough cut.

R+P Post 18: Our test shoot


Decisions
For our test shoot we plan to fully prepare for it as we would for the main shoot in order to gain as much experience as we can and judge what we need to improve on and change next time so we are as prepared as we can be for the actual shoot. 
  • We will do everything according to our production schedule. 
  • Mario will bring the kit home from school and I will bring it back to school. 
  • We will dress the set as it would be on the main shoot
  • Mario will be wearing everything that Guy would
  • We plan to test everything out on the test shoot day including natural lighting or if we need to use Mario's bedroom spotlights
  • The biggest thing we would be focusing on is getting Mario's acting spot on in terms of facial expressions, body gestures and his tone of voice. We need to make Guy shine through.
This is me trying to frame a shot.


Reflections
  • Our test shoot was very productive and fun. 
  • For our first time, we finished earlier than we had expected meaning we could check all our shots to see if we had missed any out or if we needed to redo any. This also means we could spend longer on perfecting shots in the actual shoot. 
What we need to change
  • Everything generally went well but the only things we need to improve is the bedroom's look. After watching back our shots, his walls seemed too empty, we need to put up more posters express his inner gamer geek.
  • Some of our shots lasted too long and brought the pace down to a boring level. An example is the rush below (also a blooper).
The blooper below is where I told Mario to be enthusiastic as if he was genuinely excited for a genuine date but he got carried away and misjudged where to throw his outfit choices. He nearly hit the camera and then hit his ceiling fan, bringing down some well gathered dust in the process.

R+P Post 17: Our planned costumes and props, hair and make-up


Guy's appearance: no make-up, ugly hair, horrible outfit, no glasses (too over-the top)
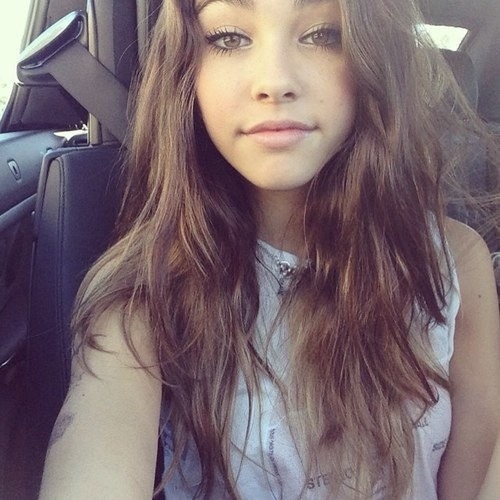
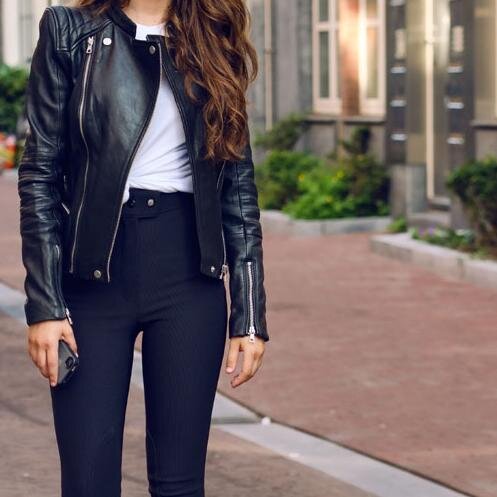
Bella's appearance: natural make-up, nice hair, stylish outfit (very tumblr inspired)


We came up with the idea to brush or gel Mario's hair into something that resembles the photos you see above. A middle parting is a very hard to pull off for a guy and often looks very bad so we decided to go with that hairstyle for Guy. Guy's outfit will be an ugly shirt paired with shorts.


Miss matched items of clothing of bold colours and patterns such as a bright shirt and shorts would be the perfect outfit for Guy. However no one we know owns anything similar so we plan to buy the Hawaiian shirt from Amazon.

R+P Post 16: Casting

Criteria for Guy

  • A guy who can act socially awkward in a comedic style to portray Guy's personality
  • A guy who is prompt and will turn up to all our shoot sessions.
  • A guy who can follow instructions well as we will need to direct him quite a lot.
Out of our two choices of actors Mario Louka and Alkim Yildran we decided that Mario Louka best fit our criteria for Guy.


Criteria for Bella (Guy's first date)

  • A girl who was attractive and stylish
  • A girl who could make realistic facial expressions of horror and disgust in a comedic style.
  • A girl who is available on all our shoot sessions.
Out of our two choices of actresses Angela Chen and Aybala Durmaz, we chose Aybala Durmaz as she best fit the role of Bella.


R+P Post 15: Our planned filming location and set design


Our planned filming location: We decided to film at Mario's house as he has the most Xbox games and boy's stuff such as male clothing and toiletries. He also has spotlights on his bedroom ceiling which provide ample illumination for our shots meaning we do not need to set up our own lights. We plan to shoot upstairs where his bedroom and bathroom are and also downstairs where his kitchen is. After shooting indoors we will shoot outside a restaurant near Southgate station for our first date scenes.

Our set design: We plan to keep our set tidy and clean with no sign of any sports equipment and plenty of game posters such as Skyrim posters and technology such as an XBOX and PC to accentuate Guy's nonathletic lifestyle and geeky character.

R+P Post 14: Our production schedule

We plan to have three shoot sessions and have created a production schedule to make sure we do not forget important details and to inform our teachers of when and where we are shooting.

TEST SHOOT
Saturday 07/02/2015: 9.30 AM - 5.30 PM

MAIN SHOOT
Saturday 28/02/2015: 9.30 AM - 5.30 PM

BACK-UP SHOOT (if needed)
Saturday 07/03/2015: 9.30 AM - 5.30 PM


My group plan to utilise lesson time for editing. However that would not be enough so we decided to create an edit schedule which requires us to meet up at lunch times and after school for editing sessions. We will also edit individually or together in our free periods depending on whether we all have the same timetabled periods or not.

R+P Post 13: Our shootboard

After the creation of our animatic we decided to make a shoot board. A shoot board is a collection of pages showing all the important details of each shot we will be shooting. We've decided to makes ours in the format of a table with eight columns. This will help us organise our day exactly the way we want it to go. Listing the props, camera directions and actions of each shot will help us know exactly what each shot requires and how it should be shot.

Here is the first page of our shootboard.


We timed our shots so we knew how long to spend on each one. However they were not in chronological order. Instead, we grouped them so we could finish filming all the shots in one setting before starting to film in another so that we broke less continuity rules. After filming we ticked each shot off and assessed whether it was a wrap or if any needed to be re-shot. The shoot-board proved vital to our efficient teamwork.


Wednesday, 4 March 2015

R+P Post 12: Our animatic

Following our storyboard we will make an animatic. An animatic is
  1. "a preliminary version of a film, produced by shooting successive sections of a storyboard and adding a soundtrack."   
  2. - Google        
  3. We will create our animatic by shooting each single post it note and upload them onto Adobe Premier where we will place them onto the editing track in chronological order. Then we will add a music track. 

Our finished animatic is here.
After creating our animatic we realised some of our shots did not take as long as we planned for them to be. So we made timing adjustments. Also we felt that the music was not perfect when put together with the action so this encouraged us to go on a soundtrack hunt for a more suitable choice.
Overall, it helped us to visualize our opening sequence easier and see if we broke any continuity rules.

R+P Post 11: Our storyboard

We've decided that after making a timeline the most logical and practical way to make our storyboard will be to draw our shots onto coloured post-it notes which we will then stick onto an A3 piece of sugar paper in chronological order. This seems to be the most efficient and flexible way to go about it. We can use different colour post-its to represent different types of shots and whatever shot we want to get rid of or change we can just take off the storyboard and replace with no hassle. It will show important details such as camera movements, framing, dialogue and transitions so that we can gain the most visually rich image of our narrative flow and make sure we do not break any continuity rules. We have decided to use blue post its for long shots, yellow for close-ups, pink for mid-shots and orange for title shots.

Here is the storyboard we made.

We all contributed to drawing and finalizing the order in which our shots would be in. Although the drawings were not very artistic, we still gained a complete understanding of the action that would take place. The storyboard will also help us greatly with the animatic we are planning to create later to see how all the shots would look put together in their sequence. We will be able to judge whether the length of time we've allocated to each shot is realistic or not and if our music track will suit the action that will be going on at various times. We will also be able to match the voice over script to the action.


R+P Post 10: Reflections so far/looking ahead

What went well

  • Working with my group on our film opening idea has been very enjoyable.
  • We have all put in an equal amount of effort and worked well as a team.
  • We have communicated frequently on social media to make sure no one forgot to go to set meetings. Coming up with our ideas was easy as we all love the rom com genre and have watched all the films we've used as references and inspirations for the Life of Guy's narrative.
  • I think we have planned to attract the right target audience and have connoted our film genre well through our opening sequence idea.
Looking ahead

  • I'm confident that we will all continue working as hard into the future and that our project will definitely progress smoothly.
  • We plan to create a storyboard, animatic, and shoot board to help our filming sessions go as smoothly as possible